 |
| New Option: Add Checkpoints in Bulk |
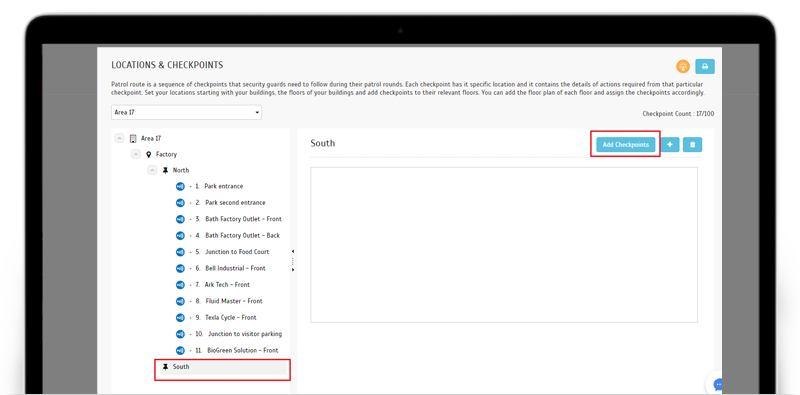
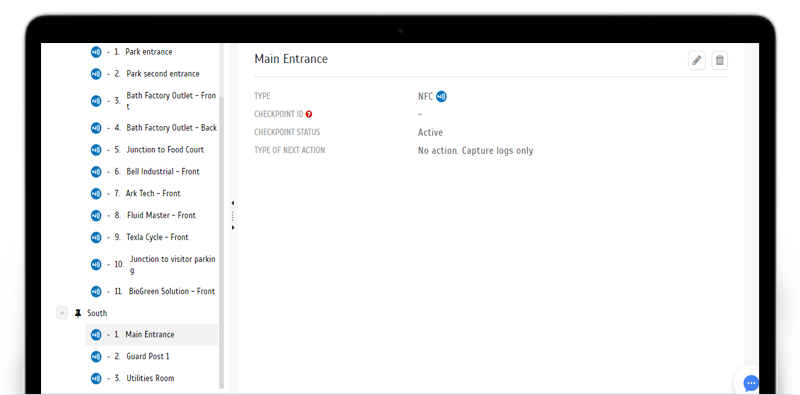
| Good news for Admins! We’ve released a new function that makes things easier when you need to add new checkpoints, especially in large numbers. While it’s relatively simple to create checkpoints individually, you can now save some time by choosing to create multiple checkpoints all at once. Go to Locations & Checkpoints, select the relevant Patrol location, then select a particular floor. On the right panel, click on the “Add Checkpoints” button to create checkpoints in bulk. Follow instructions on the form to create your required NFC/ Beacon checkpoints. |
| a. New “Add Checkpoints” button at Locations & Checkpoints |
 |
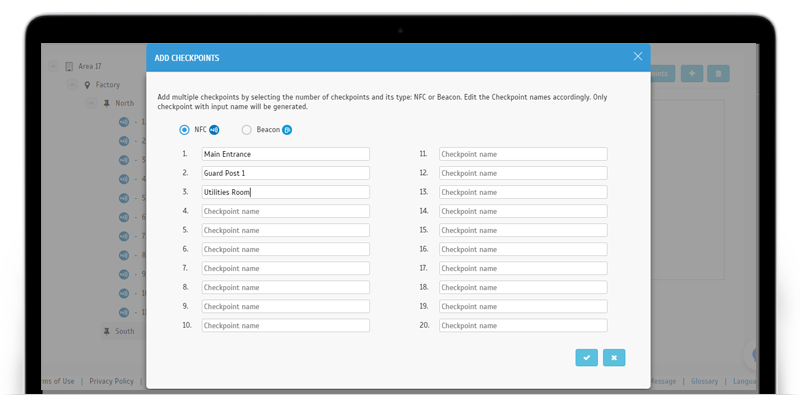
| b. Pop-up for “Add Checkpoints” |
 |
 |
| New Feature: Patrol Schedule Templates |
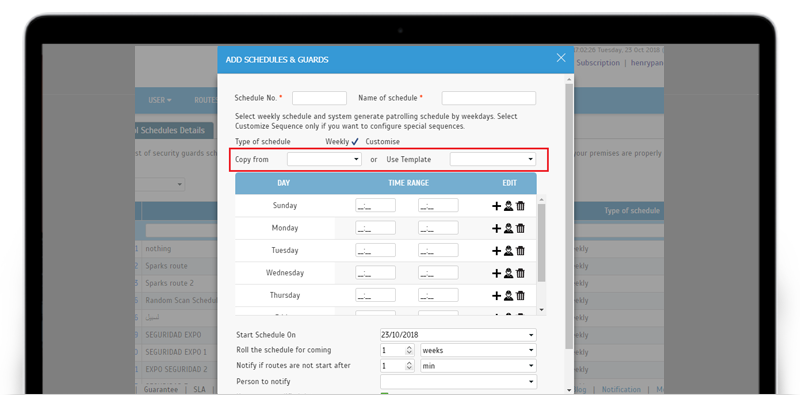
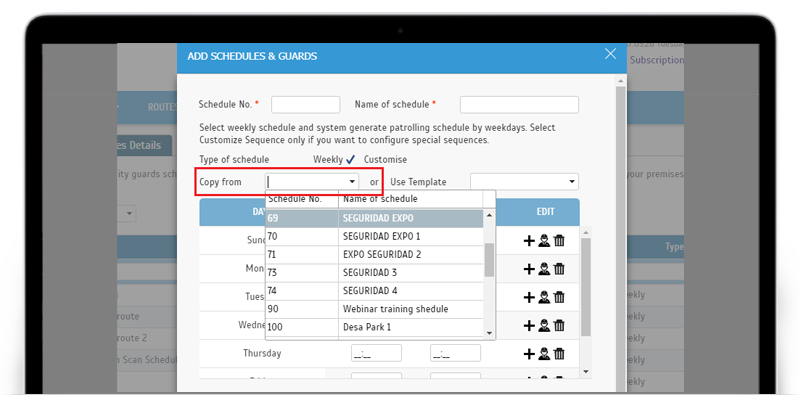
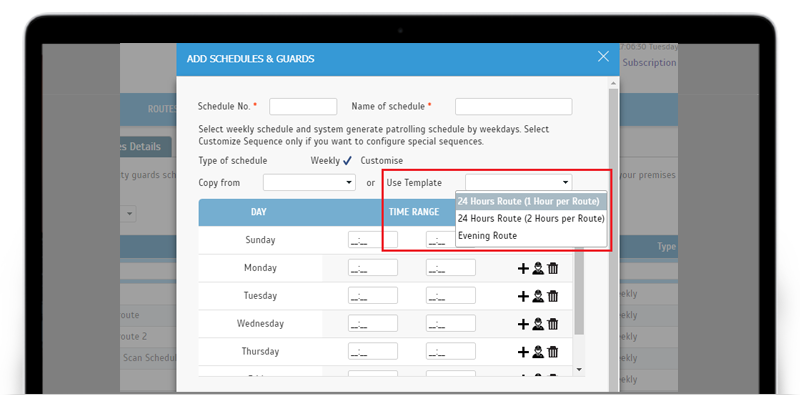
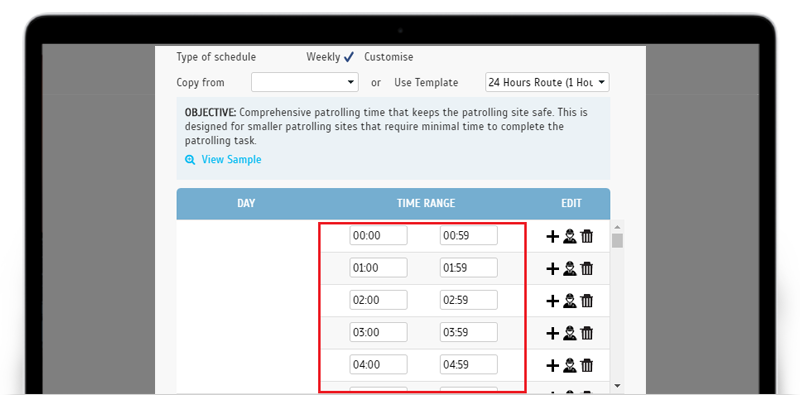
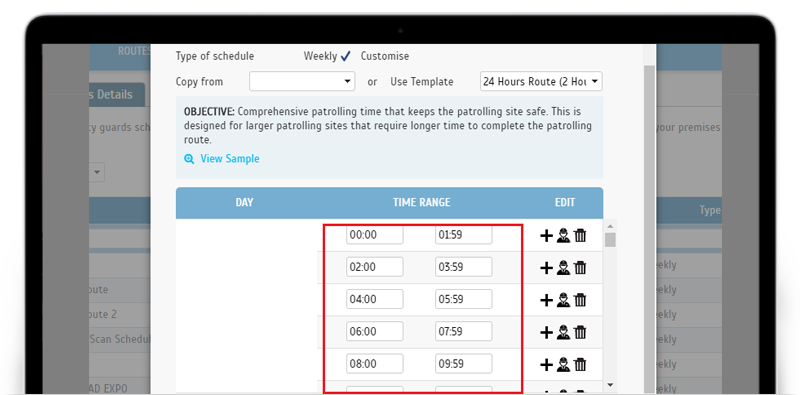
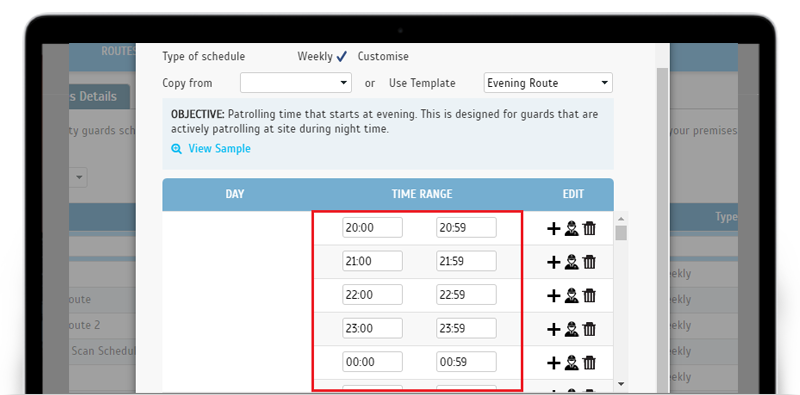
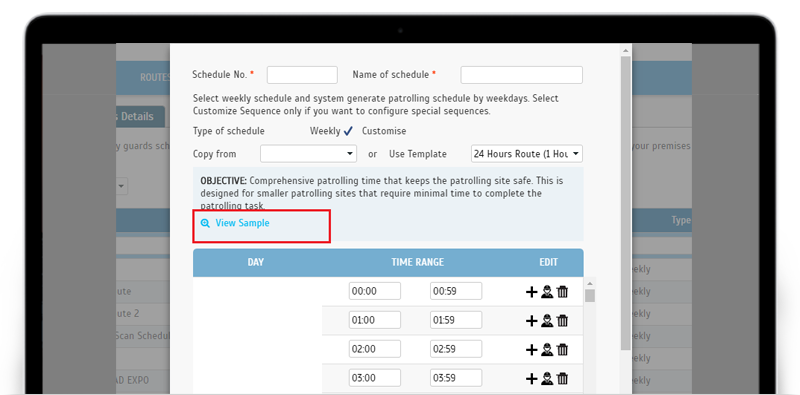
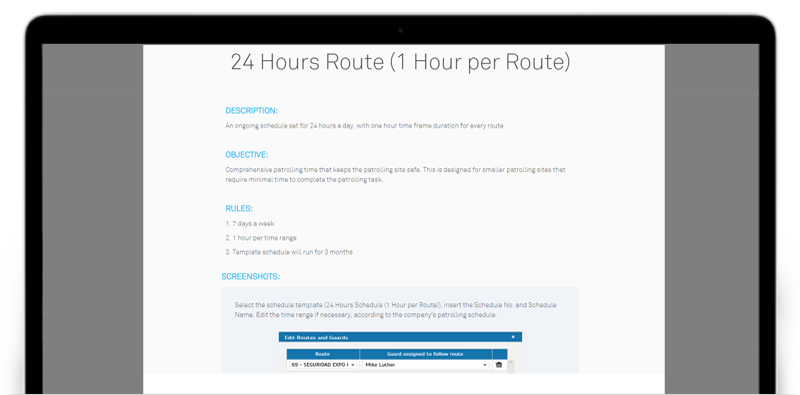
| This next update also caters to Admins, by improving the Patrol Schedule setup process. Configuring schedules takes up time, so we aim to help with that by providing some templates that will serve as an easy starting point. There are two kinds of templates, you can either choose to copy from one of your existing schedules or select from a list of system pre-configured templates. For now, we’ve prepared a few patrol schedules that will suit the more typical patrolling scenarios. This includes ‘24 Hours Route (1 Hour per Route)’, ’24 Hours Route (2 Hours per Route)’ and ‘Evening Route’. There’s also a “View Sample” hyperlink that you can refer for additional information regarding each template before you choose the best option. |
| Please refer to the screenshots below for the associated changes: |
| a. Add Schedules & Guards- Added drop-down lists for selecting schedule template
Admins can create new schedule from an existing schedule (Copy from) or a pre-configured template (Use Template). |
 |
 |
 |
|
b. Pre-configured Templates |
 |
|
‘24 Hours Route (2 Hours per Route)’ |
 |
|
‘Evening Route’ |
 |
| c. View Sample |
 |
 |
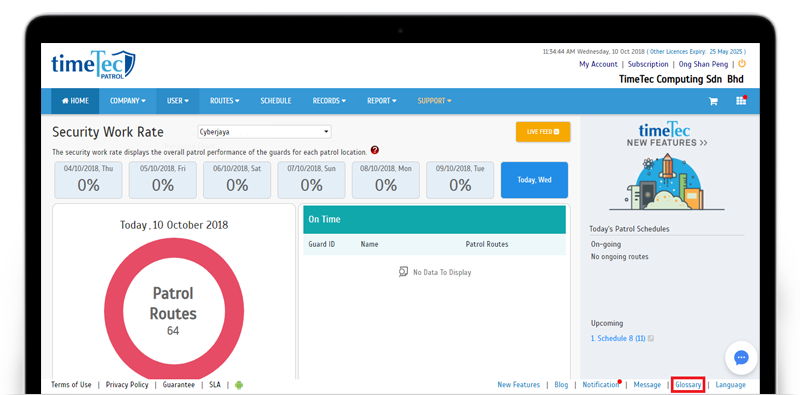
| Updated Glossary link at footer |
 |
 |
| TimeTec Patrol App Update |
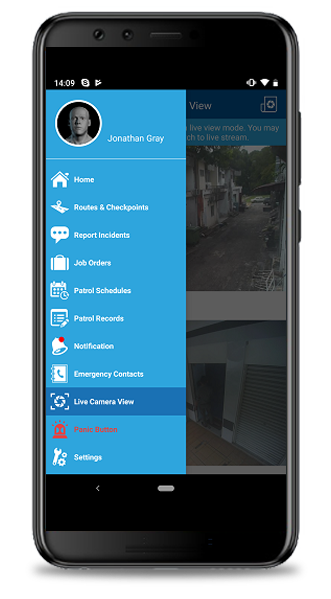
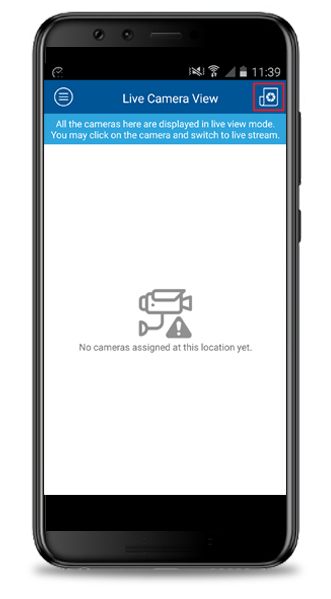
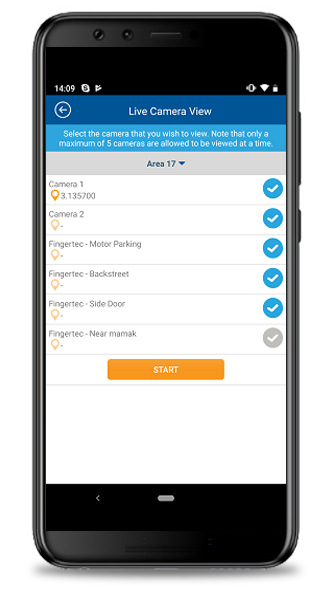
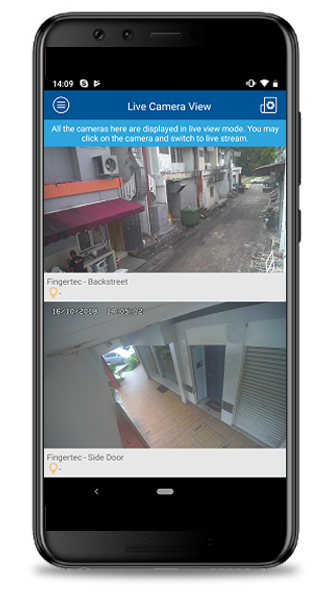
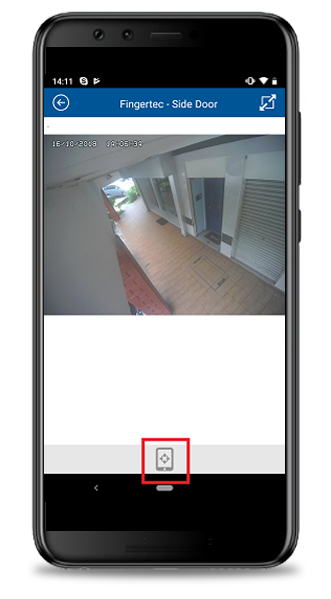
| 1. Added a new module: Live Camera View |
| In August, we announced the release of a feature known as Live Camera View, based on an integration of TimeTec Patrol with EpiCamera. Here’s a recap: if you’ve signed up for both solutions, you can go to System Settings and enter the login credentials for your EpiCamera account to connect it with TimeTec Patrol. Once connected, you can add cameras into EpiCamera and be able to watch the live stream directly from TimeTec Patrol's Live Camera View. We’ve just added this module into the Mobile App, so you can now conveniently view the images through your phone. Also, please note that you will only find Live Camera View on the side Menu if your account has been connected to EpiCamera. |
|
|
|
| Previous Issue: Sep 2018 • Aug 2018 • July 2018 |
| Note: If some of the screenshots or steps viewed here are different from the ones in the current system, this is due to our continuous effort to improve our system from time to time. Please notify us at info@timeteccloud.com, we will update it as soon as possible. |